ABOUT ME

I live in a camper van with a West Highland Terrier for company.
My passion is creating images but it is a work in progress.
I am always willing to share what knowledge I have and can be contacted through the comments on this post or e-mail ADRIAN
ALL IMAGES WILL ENLARGE WITH A LEFT CLICK

Friday 29 May 2009

PHOTO LOCATIONS DERBYSHIRE---WATER-CUM-JOLLY,

OLYMPUS DIGITAL CAMERA

Water-Cum-Jolly is located at the head of Monsal Dale a mile from Monsal Head


image


image


Parking is at the side of the road opposite the mill, rarely full mid week or early/late. At weekends and holidays gets busy, there is a pay and display car park at Monsal Head a half hours walk away. Some history of the area can be found

HERE

The mill pond is generally very sheltered, giving some great reflections at most times of the year. Waterfowl comprising, swans, canada geese, coots, moorhens, and not forgetting the ducks. Other birds are gray wagtail, and dippers below the weir if you are lucky. Below are a few of my photographs.


OLYMPUS DIGITAL CAMERA

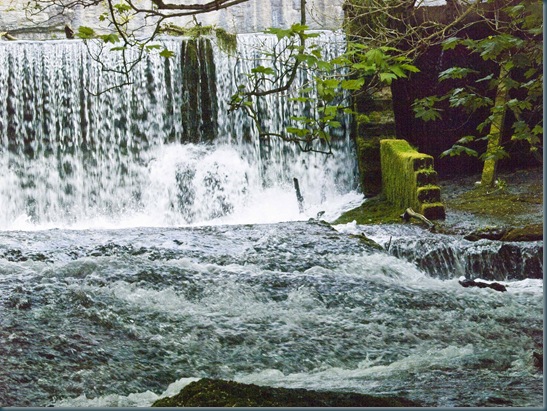
CRESSBROOK WEIR   This is easy to photograph as a footbridge has been provided for us.

OLYMPUS DIGITAL CAMERA

BELOW THE WEIR   Be careful here after heavy rain it's impossible as the whole river bed floods.


507

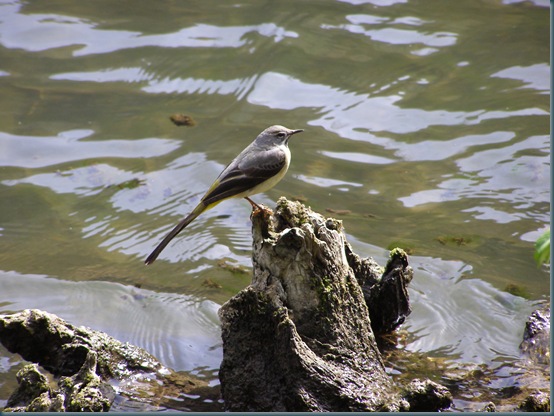
GRAY WAGTAIL   The birds are, if not tame, used to people this was taken from 3m away.


OLYMPUS DIGITAL CAMERA

COOT FEEDING CHICKS

505

SWAN NESTING   This pair have been here for a number of years, this year, the proud parents of a half dozen cygnets.

I usually take, telephoto, wide angle and a macro lenses. A tripod and wellington boots are pretty much de rigour down here. If when you cross the access footbridge you can't see a meter square of concrete the path is flooded a couple of hundred meters upstream, rarely above welly depth. Don't hold me to this! Happy Snapping.

INDEX FOR LOCATIONS  CLICK

PHOTO LOCATIONS DERBYSHIRE---MAGPIE MINE

OLYMPUS DIGITAL CAMERA

Magpie Mine is located a mile south of Sheldon, near Bakewell in Derbyshire. Access is good, about a half mile walk on a track from the road see map below


 image


image


Parking is limited at the side of the road, there is a field centre on the site but I have never been when it has been occupied. In fact I've never seen anyone else there, not too surprising it can be a bleak and windswept location. a concise history of the mine can be found here.

There are endless photographic opportunities, below are a few images by me, hope they don't dissuade you from going. My photography has much in common with my blogging, very middling as we say round here. However I keep trying.


OLYMPUS DIGITAL CAMERA

REMAINS OF THE CORNISH ENGINE HOUSE


P5283823_2_1_edited-2

HORSE GIN (This is a modern reconstruction)

For more information on Horse Gins go here

P5283811_10_09_edited-2

 MILLSTONES USED FOR ORE CRUSHING

P5283800_799_798_edited-2

ENGINE HOUSE INTERIOR

P5283775_4_3_edited-3

WINDING DRUM

I usually take a polarising filter, wide angle lens and a telephoto. The last four images are all HDR, so if you're not into that then a graduated filter may be a good idea. Take some warm clothing and happy snapping.

INDEX FOR PHOTO LOCATIONS       CLICK

Wednesday 27 May 2009

CREATING A PANORAMIC PHOTOGRAPH

How to Stitch Photographs together

Following on from yesterday I will give the workflow order for panorama construction. This is as much for me as from any altruistic intention to aid you, but hopefully we will both benefit. I can practice using Snagit and you will see how easy the process is.

The software used is Photoshop Elements 7, Elements 6 will do as the stitching software is the same and as good as I've found. Unless you want 360°/180° panoramas for planet construction or whatever. This is a better program than in the full version, though CS4 might have the same thing.

The hardware consists of a tripod and camera with cable release, you can use the self timer if you haven’t a cable release.

For this example I am going to use the three images taken yesterday, There is no real limit to the number you can use and you can join them vertically or horizontally or both, so if you want more depth to the final panorama take vertical overlapping images and then horizontal. A panoramic tripod head would be nice, but so is the price, needless to say I don’t have one.

Set up your tripod as near plumb as you can, mine has a bubble level built in, then mount the camera in either landscape or portrait orientation. Set it to aperture priority, I capture everything in RAW, if you don’t have this option don’t worry it just means you may be wise to bracket your exposures, not bad practice anyway. Photoshop can recognise and correct for differences in exposure------Nearly always!

You will need to set the aperture to f18+ to get depth of field. Set focus to manual, this is just to reassure skeptical Luddites like me that the thing is not shifting focus all over the place though it shouldn’t matter with this aperture.

Start either at the left or right, take the first image, swivel the camera to the new view overlapping the first one by 20% or so, this isn’t critical, and then repeat for your final frame.

Go home and download the exposures into Elements Organiser.

image

Find the images. Click on the first one hold down the shift key and click on the last, all should now be selected. Go to File-New-Photomerge Panorama and click.


image


If you have captured your images in Camera RAW then the next screen to appear should be the raw converter.


image

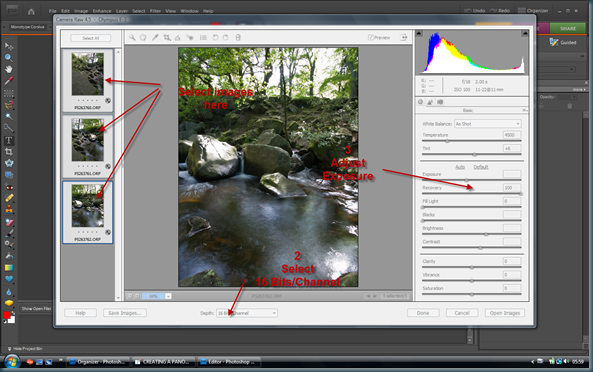
Select the images one at a time, select 16 Bits/Channel and try Auto in the right hand box If you get two black arrow heads in the histogram box then it's about as good as it's going to get. Repeat for the other two images. When you have got things perfect or in this case barely acceptable click the depth box and reduce to 8 bits/channel. Elements can't work in 16bit mode.  You should then see the screen below.

 image


This is how things should look after editor opens. Check that the layout radio button Auto is selected. Click Add Open Files. Select OK.

Go and make a cup of tea and let the program do it's magic. Should you have plenty of RAM memory it only takes a minute. You may notice some fine white lines, these are mask joins. Don't worry just press ctrl+shift+alt+E (Stamp Visible command) and they will go. The next step is to crop the image.

image


You should end up with something similar to the screen grab below.


image


The job is done at this stage but can be further enhanced by entering the layers pallet and adjusting, levels, brightness contrast, saturation. If you manipulate the image this way you can always delete or cancel a layer, this is the basis of nondestructive editing and a better way than using enhance in the tools menu.

[If you want to use enhance and get back quickly there is Undo at the top right of the screen or ctrl+Z does the same job. Better still, drag Layer 1 to the little square with the turned up corner, this will give you a duplicate Layer to work on.]


image


When you see the above screen click on the shadows control  hold down the alt key and you will get a white screen slide the button towards the right till you start seeing some yellow then back off a bit. Repeat the same for the highlights, this time it's a black screen and red shows highlight clipping. The middle slider is a Gamma control and globally brightens or darkens the image.

Brightness/Contrast is accessed the same way as Levels. Again play with the sliders till your hearts content.

Click the adjustment layer icon, you know where it is now! Select Hue/Saturation and slide about till the picture looks good, surreal, or even monotone. For the latter just shove the saturation slider all the way to the left. In the Saturation controls you can select from master and any of four or five colour channels. this is good if you want to tone down say greens whilst leaving other colours relatively unaffected.

image


That's about it, it just remains to flatten the image. Don't do this if you want to continue editing. Next save your image, I tend to save as tiff  then do what I want with them later,

 VOILA THE FINISHED JOB!!


OLYMPUS DIGITAL CAMERA


Please feel free to criticise, I've been on this Blog malarkey for a few weeks and it's 'CANARD'!!

Thanks Rodney "Only Fools and Horses"

Tuesday 26 May 2009

PADLEY GORGE DERBYSHIRE

Woke up at the crack of dawn this morning, well about an hour before and it was still raining. I'm trying to decide whether this early awakening is due to a guilty conscience or imminent prostate problems. However it's of no relevance and I'm sure you're not interested, if you are you're reading the wrong Blog.

Dawn slid upon us, no burst of colour just a gradual transformation from dark dirty gray to light dirty gray. Half a gale blowing.

Fetched the paper, had my porridge, did the crossword and noticed that the wind was much less violent, and the sun was starting to appear through the cloud cover so headed out for Padley.

I fancied either some panoramas or maybe a dabble with HDR, neither process is helped by wind and the venue is much better with thin cloud cover. The shadows under the trees are too harsh and the reflections off the stream get blown out in direct sunlight.

Arrived around ten o'clock, much too late as there were already plenty of people about. This is an early morning venue. for those unfamiliar with the area I've done you a little map with help from Google and Snagit.

Snagit

 image

The dog had a good run around, I had a paddle in the brook and managed about fifteen or twenty exposures before I got sick of waiting for ramblers, children, twitchers et al to clear my view.


OLYMPUS DIGITAL CAMERA

Three Stitch Panorama Burbage Brook 

The photograph above shows the problem with sunlight here, I had a polarizing filter but must have twisted it fixing the lens hood. I forgot to check as Molly had taken herself off to play with a couple of children. Must learn to multi task!


P5263753_2_0_edited-1

Three exposure HDR ev+/-2


The above could have done with another exposure at -3ev, but there was too much going on for me to concentrate so packed up and went a walk up to the Toads mouth. This is,in it's essence, three gritstone boulders and one needs a pretty vivid imagination to determine the toad bit, but more romantic a title than pile of rock!

That's all today, I'll try for a 'How To' on stitching now I can do screen captures. Sorry I'll rephrase that, now I have the software to do screen captures. It's a bit more Snag than IT at present. I'll also publish this to Blogger it looks OK in Live Writer, take about a second to become a right dogs dinner! Hey it worked!!

Monday 25 May 2009

Chee Dale

2872_edited-1

Dawn over the river Wye

2851_edited-1

Filtered sunlight

Been absent for a day or so, but got up this morning and wandered down into Chee Dale, took a macro lens for the camera as summer is on its way and flowers are blooming everywhere.

It was a gorgeous morning and I had the place to myself, at six thirty I wouldn’t really have expected any different. There was a fine dew, not really enough for spectacular pictures but as the principle reason for my perambulation was to clear my head, there’s so much to organize when you are anticipating being away for practically two years, the photography was a bonus.

OLYMPUS DIGITAL CAMERA                  

       Lady's Smock                                            

P5253729_8_7_edited-2

Dandelion HDR


OLYMPUS DIGITAL CAMERA

Birds-Foot-Trefoil


Friday 22 May 2009

As the weather this week has been showery, that's the polite way of describing it! Our Met. Office say we are in for a BBQ summer, this does nothing to assuage my gloom, every time I even look at a BBQ the heavens open.
So here are a couple of early attempts at HDR.
They are pictures of my local church. St John the Baptist in Tideswell. Known as The Cathedral of the Peak. It's well worth a visit if only for the magnificent carving, attributed to Advent Unstone and no doubt his forebears.
The last two images are not HDR but general views of the exterior.
I'm still waiting to get the finance through for the motor home, but seem to be on target to get away mid June. The forecast is better for the weekend so should get out with both camera and dog.

Wednesday 20 May 2009


TWO TROUGHS
Sunday morning went out, weather was mixed, heavy showers, the misery alleviated by the odd glimpse of the sun.

Living in the Peak Park it’s a little strange that I’m tempted to drive prior to starting a walk. Every other blighter and their dog are driving here and whilst I might not be reciprocating exactly, it is a touch illogical to drive to walk.

So whilst pondering on where to go I remembered I’d forgotten to fuel the truck. Fortunately I recalled there are numerous walks within, well, walking distance.

Leaving home with Molly plus Olympus 560-UZ we meandered our way onto the Limestone Way and headed south towards Millers Dale. It really is a great season, lush, vibrant greens, new life everywhere, rain, wind and yet more rain.

Having negotiated half a dozen stiles, I began to think a larger dog would have been a wise aquisition. West Highland Terriers can’t climb walls and negotiate stiles without assistance. What’s worse is that you can see the cow muck they’re covered in and their long coats hold copious quantities of it, unfortunately not securely. The result is that after less than an hour we both look and smell as if we’ve been rolling in a midden (dung heap). One of us has. The other acquired it by proxy.

BUGLES

We happened upon a clump of tiny blue flowers buried in the grass, kneeling down I carefully bent the most obtrusive grasses to one side and tried to focus, auto focus is great, got three exposures of blurry blue and sharp grass. I stretched out flat, Molly thinks this is a great game, leaping around grabbing bits of clothing and barking, this almost solved the problem, it was a miracle there was anything left to focus on.

I hadn’t got a clue what they were, looked in the book, not that it did me any good. There is a plethora of blue flowers out there, a goodly number of yellow, white and purple ones too! Pity  they weren’t red, not as many pages of them!

Is it too much to ask that botanists classify flora according to colour? Now there’s an idea for a budding author. A natural history guide classifying plants according to size and colour, Big Blue things, medium Yellow ones titchy white jobbies etc.

 I have developed an almost infallible method of solving this problem. I upload the images to Filckr, and put any old tag on it, this demonstrates enthusiasm and interest. Make Jim Horsfall a contact and within an amazingly short period of time back comes the answer. Bugles! Thank you once again Jim.

Back to the walk and the rain, Three miles or so out and another four back home, things were starting to feel and look a little grim. About to be made a whole lot worse by an inappropriate solution to a problem more perceived than real. A galvanized gate of truly epic complexity married to oak stoops, gate posts to the rest of the world. And with a sign and post advising that I was on a Bridle Path and that were I on a motorcycle proceeding was against the laws of the land, presumably only if heading downhill as the gate at the northern end is a reasonable oak job sans sign.

EYESORE

I’ve never been one to gainsay a person's employment but can’t perceive any logic behind the design and execution of this eyesore. It can’t be policed effectively and in the unlikely event of a successful apprehension the penalty would, I suspect, be derisory. The solution is worse than the problem. Perhaps the next stage is to have wardens to enforce the unenforceable. They could then be furnished with off road transport.

Monday 18 May 2009

Two Water Troughs

Photoshop

Improving Performance in Windows Vista

This is not a tutorial my object is to get some information and general feedback about a subject I’m a touch hazy on. I don’t have Photoshop but use Elements 7. Hopefully this will change as after a couple of years with Elements I feel that the tools in CS 3/4 warrant the expenditure. If only for their entertainment value.

The problem is waiting; the following are the steps I’ve taken to reduce it. The solutions can be divided into two separate areas. The first are the settings in Photoshop itself and the second optimising Windows Vista. So here goes.

Open Elements/Organiser and go to Edit.

Down at the bottom you will find Preferences click on it and select Editor Preferences then select Performance

When the box opens up you will see an option that allows you to apportion more RAM to Photoshop I gave it about 70%. Much more and I suspect you would have problems with the operating system.

Next go to history, I dropped this to 20, I edit non-destructively so it’s quicker to just delete a layer in the layers pallet. Plus I’d never remember what I did ten key strokes ago never mind fifty or whatever the default setting is. Fifty Ctrl+Z’s, the mind boggles!

Proceed to Cache and I went for broke here, ‘The full Monty’. As far as I understand things this speeds up redraws, histograms and such matters. Must be good then!

Nearly done, the last option is to designate a Scratch Disc, I’m lucky I have an empty Data disk which I have allocated for this. As I understand things, when Photoshop runs out of Ram it uses Hard Drive memory as a sort of stop gap. It doesn’t seem a particularly bright idea to have it running to Drive C or whatever drive windows is installed on. If you can’t avail yourself of this luxury I can see no good reason not to buy an external Hard Drive plug it in and designate that as your scratch disc. You don't need much about the same as the RAM you've got. So if you can partition it (see below) you will get a back up drive as well for a few pounds.

All done, restart Photoshop and things should be better. I assume you have to restart it. One does if you install plug in filters.

Speed up Vista

If you are a graphics fan ignore this as it will turn your computer into a pretty drab environment.

Go to Computer (used to be My Computer) Click System Properties, select Advanced, go to Visual Effect Performance and hit the radio button Adjust for best performance. Don’t panic... 'Cpt. Mainwaring'... everything goes a mucky black and white and a crude sign says please wait. No expense spared here then! Do as you’re told and all will come back on but without 3D effect, with simple icons, no fade or swirly bits it must speed things up. I tried it but as I like things pretty restored settings to Let Windows Decide.

Try stitching a panorama. It seems to work faster.  I haven’t actually timed the same stitch before and after. I’m not quite that bored, you never know, if I don’t get away soon the stop watch may well be employed!

There is a further stage and that is repartitioning your Hard Drive, looks a bit dodgy to me! So have left this one till I have either an old computer or somebody elses to try it on. The simplest article I found is here

Sunday 17 May 2009

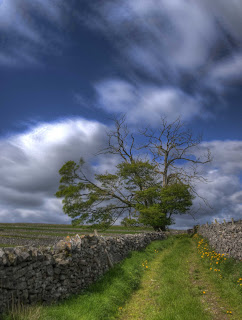
Half Alive Tree (Think positive!)

Thoughts on HDR

Right here goes, this is what I do but still some work and some don’t. Don’t use PShop; for this you have Photomatix and version pro 3.1 is the best I’ve found. The only problem I have is that adjustments don’t happen in real time so you can spend a fair bit of time undoing. Ctrl Z doesn’t work there’s a little arrow at the bottom for undoing.

1.    Set the camera capture to RAW

2.    Set White balance to 5500K, this isn’t important you can rectify any colour casts in the RAW converter later but you don’t want the white balance to change

3.    Set focus to manual

4.    Set exposure to manual

5.    I don’t set to Brkt.

6.    Set aperture to F18 or so. There seems little point in having all that range and half the job out of focus.

7.    Set camera metering to spot.

8.    Set ISO to around 100, if later your longest exposure is much over 15” then I increase the ISO. It’s a trade off you are trying to avoid noise; it’s a nightmare to get rid of.

9.    Put camera on the tripod

10. Connect cable release or use the self timer

11. I set mirror pre lift to 2”, on long exposures it doesn’t really matter.

12. Make sure image stabilization is off.

13. Point your camera at the darkest bit and make a note of the speed for a correct exposure, or remember it if you can

14.  Point your camera at the brightest bit and set the correct speed.

15.  Compose your shot, focus and fire away increasing the exposure time by 1ev until you get to the time you wrote down. This can be in 2ev steps if you want.

16. Job done go home.

Now for the workflow:

1.    Load images into PShop and into the RAW converter

2.    Select all

3.    Adjust WB if necessary

4.    Set black slider to 0 leave everything else at default

5.     Click done

6.    Open images in Photomatix HDR generator. Sometimes it says it doesn’t like the file format, just click on OK for each image. It likes them fine really; it’s just trying to wind you up.

7.    Click OK, then I select align by image details (this takes longer but works fine) select reduce noise and chromatic aberrations the Ghosting reduce option appears to do beggar all but select it if you want then click OK and go and make a cup of tea or cook a five course meal.

8.    When the image is done, it will look awful, panic not, click Tone mapping and if it still looks pretty awful set sliders to default it’s at the bottom. Photomatix saves your previous settings, very useful if you are going to stitch multiple images Then come back up set strength to max, saturation to around 65 luminosity to as bright as you want and smoothing to high or very high

9.    You should have something reasonable without messing with anything else, half the sliders appear to have little effect, or maybe it’s my eyes.

10. Save it and load back into Photosop editor

11. Go to layers pallet select levels, Click the left hand slider hold down the Alt key and slide till you see bits of yellow.

12. Go to the white end and do likewise.

13. I tend not to use the gamma slider but click OK.

14. Select brightness/ contrast and adjust if you think fit click OK.

15. Select Hue/Saturation I like bright saturated colours but suit yourself and click OK.

16. The Photo of the half dead tree had a bit more work, I press Ctrl+Shift+Alt+E ,a pet octopus is handy here, (stamp visible). Make sure it’s at the top of the layers stack, set blend mode to overlay and adjust opacity this gives very fine control over the end result

17. Select layers flatten save it and the jobs a good un.

18. I leave things at this stage I don’t sharpen or interpolate image size till I know what it’s going to be used for. (If anything in my case)

Hope that’s all clear as Mud, Feel free to criticise me, curse me, or whatever. There’s rarely a right and a wrong way for anything and I’m still at the beginning and learning.

Thanks to the man who gave me so much encouragement  Dan Norcott

 This processing can be slow, there’s no substitute for RAM and fast processors, but there are work rounds. Let me know if you need them.

See Stephen cotton wool clouds, it was blowing a gale this day so Brkt. may be a good idea.

Friday 15 May 2009

For you Stephen. Yes you can substitute long exposure water for short, and anything in between.
As long as you have sufficient different exposures. Left is a 5 exposure HDR and below it is the same thing with the water replaced. Register is not perfect but could be as this only took 5 mins. Easy as falling off a log. Posting this took ten times as long. Supposed to be so simple this blogging that it's well within the capabilities of a primate with a frontal labotomy---trouble is I don't know where to find one! At least the underscoring has disappeared today.

Thursday 14 May 2009

double clickOh! Fancy a swim do we/ Perhaps not

A quiet couple of days since my last dissertation. Tuesday morning went out armed with the camera, back Down to Water-Cum-Jolly. Getting a bit of a habit is this place.
The sun was constantly cloud dodging, far from
 ideal for HDRs but here are the results. This view from under the weir I've never tried before. There's usually too much water and the vantage point is somewhat damp not to mention potentially expensive I suspect that there's a limit to Olympus and their splash proofing technology.
Went out motorhome viewing again yesterday. Slowly getting there I think. I am pretty sure of the basic specification I require.
Winterised
Heating
Dedicated berth
Separate freezer
It's just a matter of dropping on the right vehicle and one which is within my budget, always a pain are financial constraints. Ideally I would also like change from the purchase to invest in Photoshop CS4. I'll need something to pass the cold winter nights stuck in the back of beyond.
In my experience and with my innate ineptitude with all things Adobe, this acquisition should fit the bill nicely.
Still no cygnets hatched, that swan must have the patience of a saint, or possibly little else to do but sit on a pile of sticks and eggs.

However all was not doom and gloom for I came across these Coot chicks are but a few hours old and this brave soul is already ready for a swim. Spent an hour or more watching them. Unfortunately I didn't have a long enough lens, truth is I don't own a longer lens.
I do have a teleconverter but as is often the case it was sitting at home.
Anyone know how to get rid of this underscoring?